
You don’t need me to tell you that it’s a dangerous world on the Internet. Hackers abound, which is why you should always make sure you’re following WordPress security best practices. And one of those best practices is learning how to add two-factor authentication to WordPress.
I’m not going to focus very much on the basics of two-factor authentication and “what it is” in this post. If you’ve ever banked online, you’re probably already familiar with the concept anyway.
Instead, I’m just going to dive straight into how to add two-factor authentication to WordPress using the miniOrange two-factor authenticator plugin.
Two-factor authentication is serious business – why miniOrange?
I recommend miniOrange’s two-factor authentication plugin for a few reasons:
- miniOrange isn’t just a WordPress developer. They’re a legitimate security company that works with organizations like the Bank of Melbourne.
- The plugin is regularly updated and well-reviewed.
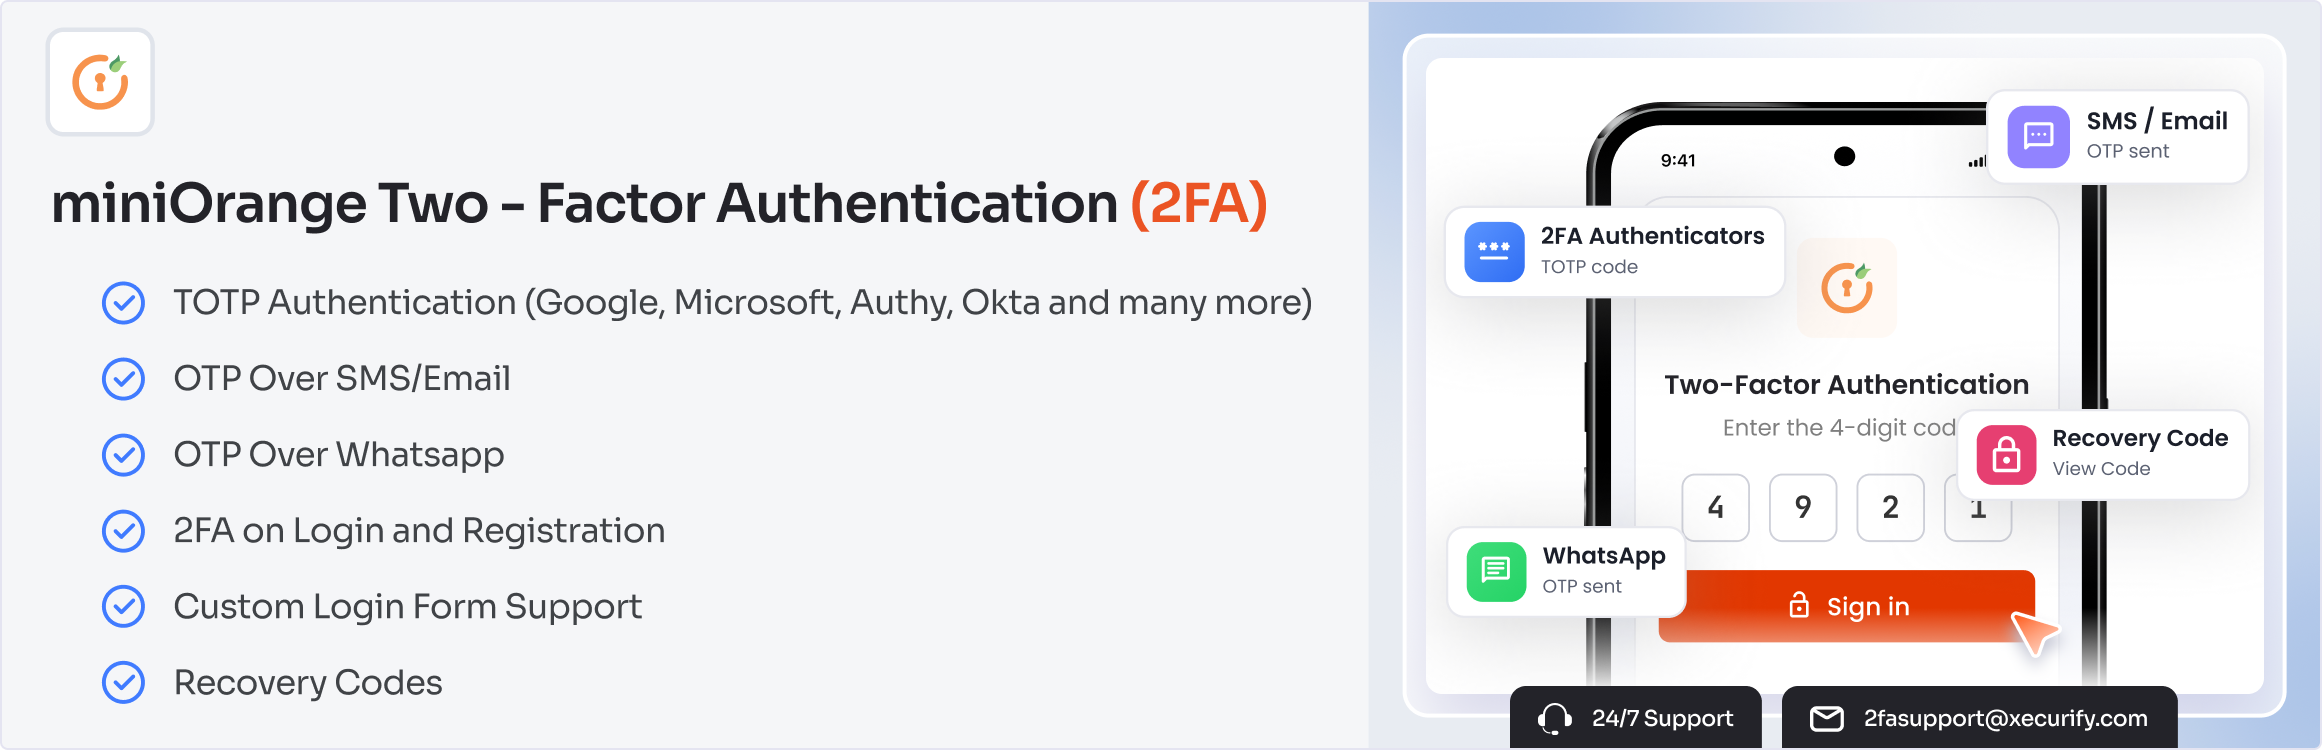
- It offers multiple authentication options. You can get texts, use the Google Authenticator app, and plenty more. Other popular plugins are usually more limited.
Additionally, if you need to migrate from Clef (another popular two-factor company who will soon cease operations), miniOrange makes that easy.
How to add two-factor authentication to WordPress with miniOrange
Before getting started, make sure you have your phone handy because you’ll need it to get your authentication code.
Once you have that necessary piece of technology in hand, you’re ready to dig in.
Step 1: Install and activate Google Authenticator – Two Factor Authentication by miniOrange
To get started, begin by installing and activating Google Authenticator – Two Factor Authentication by miniOrange.
This step can actually be a little tricky because there’s another popular plugin also named Google Authenticator. So make sure you install the one that’s developed by miniOrange:

Step 2: Register with miniOrange
In order to use the plugin, you’ll need to register for a miniOrange account. Don’t worry, though – it’s completely free unless you want to unlock some premium verification methods.
Head to the new miniOrange 2-Factor link in your dashboard sidebar, enter your details, and click Submit:

After you click submit, miniOrange will send an OTP (short for One Time Password) to your email address to verify it. You need to enter that code on the next screen.
Your email will look something like this:

And just plug that code into the Enter OTP box in your WordPress dashboard:

On the next screen, you’ll see pricing options. Unless you need something like WooCommerce two-factor authentication, you’re totally fine to use the Free plan. To do that, just click the Ok, Got It button in the top right:

Step 3: Set up security questions
You don’t need to set up security questions, but it’s a good idea in case you ever lose your phone.
To set them, just click on the notification prompt that the plugin displays:

Enter all three questions and answers and then click Save:

Step 4: Choose login settings
On the Login Settings tab, you can choose a few important details. In the premium version, you can enable two-factor authentication for specific user roles. But unfortunately, that’s not available in the free version:

But if you scroll down a little further, you’ll see the Select Login Screen Options. First, choose how you want people to log in. You have two options:
- Login with password + 2nd Factor – you’ll have to enter both your password AND the two-factor authentication code to log in.
- Login with 2nd Factor only – all you need to enter is your username and the 2nd Factor (not recommended – this kinda makes it…not two-factor authentication anymore).
Assuming you select password + 2nd Factor, which I recommend, you can also choose whether or not to enable the “Remember Device” option.
This is a common feature of two-factor authentication. If enabled, you won’t have to enter your 2nd factor when logging in from a device that is “remembered”. That is, you only need to go through two-factor authentication for the first time that you log in from a new device:

And the other thing you’ll want to configure is the What happens if my phone is lost, discharged or not with me box just below. If you enable this, you’ll be able to log in with your security questions in the event that you lose access to your phone:

Step 5: Configure your two-factor authentication method(s)
Ok, time to actually pick a verification method and add two-factor authentication to WordPress.
Despite the name, this plugin offers many more authentication methods than just the Google Authenticator app. In the free version, you can set up:
- SMS authentication (you get 10 free SMS messages, but after that you’ll need to pay)
- Google Authenticator app
- Scan QR code with miniOrange Authenticator app (similar to the now-defunct Clef method)
- Authy 2-Factor Authentication app
I’ll show you how to set up SMS messages and Google Authenticator, but you should feel free to use whichever method you feel most comfortable with.
To set up SMS authentication, go to the Setup Two-Factor tab and choose the OTP Over SMS option:

Then, enter your phone number and click Verify. miniOrange will text you your OTP. Then, just like when you verified your email, you need to type that in the box and click Validate OTP:

To set up Google Authenticator, you first need to download the Google Authenticator app on your smartphone. Then, go to the Setup Two-Factor tab and choose the Google Authenticator option:

On the next screen, choose your smartphone type. Then, you’ll see a QR Code and a box to enter the OTP you’ll get after scanning the QR code:

To get your OTP, launch the Google Authenticator app on your smartphone. Once you’ve got the app open, select Begin Setup and then choose Scan barcode. Then, scan the QR code you see in the miniOrange WordPress interface.
After you scan the QR code, you should see a 6-digit OTP code in the Google Authenticator app:

Enter this code and click Verify and Save. Just be careful – the code expires after a certain amount of time, so you always need to use the current code that you see in the app.
What does two-factor authentication look like?
Once you’ve chosen your method when learning how to add two-factor authentication to WordPress, you can test it by trying to log into your site.
At first, you should see your normal WordPress login screen. But once you enter your username and password, you should see a second prompt asking for your two-factor code:

And now you’re all set! Figuring out how to add two-factor authentication to WordPress is a great way to combat some of the most common WordPress attacks, don’t forget to also follow all the other WordPress security best practices to keep your site safe.
And of course, in case you have any questions, don’t hesitate to reach out to us in the comments.

FREE GUIDE
4 Essential Steps to Speed Up Your WordPress Website
Follow the simple steps in our 4-part mini series and reduce your loading times by 50-80%. 🚀


NO – don’t use miniOrange. I’m glad they gave you top-notch service since you write a blog but that’s NOT the average customer experience. Their licensing and product descriptions are deceptive, making you pay for an additional tier on the hopes that it’ll start working and when it still doesn’t work, they go dark and won’t talk to you anymore. They have what they were after – your money – so why should they? Look at the verbiage of their positive reviews – they wrote those themselves.