
Here’s how I install WordPress locally … on my own computer, with no web host, no risk, no cost, and nobody watching. The tool I use for this is called XAMPP. It basically makes your laptop act like a real server – albeit just locally. You can run WordPress on it just like it would online.
This guide shows every step you need to take to set up WordPress using XAMPP on your local machine. I also cover common XAMPP errors and how to fix them. When you finish, you’ll have a working WordPress site that lives only on your computer.
🚀Before we dive in, here’s what we’re going to cover: install XAMPP, start the required server modules, add the WordPress files to your htdocs folder, create a database in phpMyAdmin, and then run the WordPress installer in your browser.
If what you’re actually looking for is how to roll out WordPress for a live site, then you might want to consider going straight to a host like Bluehost and let them handle the technical setup for you. Bluehost is a web hosting firm. The way this works is that you select a hosting plan that fits your needs (most of the time it’s going to be the cheap plan at $3.79 / month), and then select the option to have WordPress installed on your setup automatically. Done and done.
Did you know that there is now more modern software that you can use to install WordPress locally? There are a couple of tools like that, actually, but my favorite and the one I recommend most people use is simply called Local. Here’s a guide on how to install WordPress with it.
XAMPP is still a perfectly workable option if you want a more manual local server setup, but many WordPress users prefer tools like Local for a simpler WordPress-specific workflow.
Step 1: Download and install XAMPP on your computer
The first step on your way is to download and install the XAMPP software. This is the tool that’s going to allow all of it to happen!
Go to the 👉 official website here. There are versions of XAMPP available for all the major systems, so just pick the one that matches your machine. The installation process itself is similar on all of them, so don’t worry.
It’s a fairly large download, so it might take a minute or so depending on your connection:

Once the download finishes, run the file you downloaded to launch the XAMPP installer. If you’re running antivirus software, you might get a warning, but you can ignore it (assuming you’re downloading the app from the official source).
You’ll see the XAMPP installer. To begin, just click on Next and follow the prompts:

On the next screen, you can choose which components to install. To install XAMPP and WordPress, you do not need all of the components. You can deselect the developer tools.

Just click Next a couple times more to get the install process started.

Be warned, though, the installation can really take a couple of minutes. It might even seem like it’s stuck. Just be patient and give it time. 👍
When it’s all done, you’ll see a screen like this:

Note: If you need a more general guide on installing WordPress in other environments – not just locally, but on live servers as well, then please hop over to our detailed guide on the topic here.
Step 2: Start the modules and test your server
Even though after launching XAMPP all might look like it’s been fully set, there are actually still a couple of steps for you to take care of.
First, go to the Manage Servers tab. Once there start all the services on the list:

Simply select each service one by one and click the Start button.
Once you launch them, you should see their status turn to green:

And now you should be able to test that your local server is working by going to http://localhost/ in your web browser of choice. You’ll see something like this:

If all went well, you now have a functioning XAMPP server on your local computer!
Now it’s time to install WordPress!
Step 3: Add the WordPress files
If you’ve ever installed WordPress manually, the rest of the process should feel pretty familiar. First, you need to go to wordpress.org and download the latest version of WordPress.
Then, navigate to the folder where you installed XAMPP. The easiest way to find it is to go back to the main screen of the XAMPP app and click on Open Application Folder:

Then, open a subfolder called htdocs. Once there, create your own subfolder. This subfolder is going to serve as the home of your website files, so it’s best to give it a descriptive-enough name. I went with myblog:

This folder is where you should put all your WordPress files from the WordPress archive that you just downloaded. So first unpack the WordPress ZIP and then move all the contents to your new website folder.
Later on, you will use that folder’s name to navigate to your local site. For example, mine is going to be: http://localhost/myblog
Step 4: Create a database for WordPress
Next, you need to create a database for your WordPress install. To do that, go to http://localhost/dashboard/ and from there click on phpMyAdmin, which is in the top menu:

Then click on Databases at the top:

Enter a name for your database and click Create. Your name can be anything – just remember it because you’ll need it for the next step:

On many default XAMPP installs, you won’t need to create a separate database user for a local WordPress site. Still, use whatever database credentials your own XAMPP/MySQL setup is actually configured to use.
Step 5: Install WordPress locally via the on-screen installer
When you visit your test site now, you should see the normal WordPress installer. Remember, your test site is just http://localhost/YOUR_FOLDER_NAME. In my example, that’s http://localhost/myblog
You’ll see this:

Just click on Let’s go!
The only step where this process will differ from a normal install is the database details. In many default XAMPP setups, you can enter the following:
- Database Name = Name of the database you created in PHPMyAdmin
- Username = “root”
- Password = leave blank
If you’ve secured MySQL/phpMyAdmin differently, use those credentials instead.
For me it’s this:

If all goes well, you’ll see the success screen.
If the installer cannot write the config file, you’ll see something like this:

If that’s the case, just copy the contents of the config, paste it into a new file and save it as wp-config.php – save it in the main folder of your WordPress install. Click on Run the installation once you do that.
At this stage, all that’s left is to set your site title and add your WordPress admin user – this is the user account that will be used to interact with your WordPress install. Simply pick a username and password and click on Install WordPress.

When done, you’ll see the final confirmation screen and a link to log in to your site. Click on it and then enter the username and password that you just set a second ago.
That is it! You’ve just installed WordPress locally using XAMPP! You’ll see the main WordPress dashboard.

Troubleshooting common XAMPP errors
If you followed this tutorial above, you should hopefully be up and running without any issues. However, in rare cases, you might run into some XAMPP errors which require troubleshooting.
Here are some tips for fixing common XAMPP errors… ⚠️
XAMPP Maximum PHP Execution Time Exceeded error
The Maximum PHP Execution Time Exceeded error is a known issue on WordPress installs created with XAMPP.
Thankfully, you can usually fix it just by editing a single line in one of the XAMPP configuration files.
To begin, open the main XAMPP app again and click on that Open Application Folder button.
Then, go into a subfolder called etc.
From there, open a file called php.ini in a simple text or code editor like Notepad or Sublime Text.
In the file, search for the following line:
max_execution_time
You should see something like max_execution_time=120.
To fix the maximum execution time error, all you need to do is increase the value of that number. For example, you could try doubling it to 240.
XAMPP Maximum File Size Exceeded error
The Maximum File Size Exceeded error is another issue you might come across, but only once you try to upload files to your local WordPress install later on.
Thankfully, it’s easy to fix, too. In fact, you can fix it from the exact same spot where you fixed the previous error – the php.ini file.
To begin, open the php.ini file (you can follow the steps in the previous section).
Then, search for the following line:
upload_max_filesize
You might see something like upload_max_filesize=40M.
To increase the upload limit and fix the error, all you need to do is increase the number. For example, you could make it upload_max_filesize=80M.
While you’re editing the php.ini file, you’ll also want to make the same change to the post_max_size value.
XAMPP Apache Shutdown Unexpectedly error
This error means that something went wrong with Apache that caused it to crash. Apache is the webserver that XAMPP relies on, so a crash in Apache means your local development sites will stop working.
Because this is such a critical error, we have an entire guide on how to fix the XAMPP Apache Shutdown Unexpectedly error.
Error 403 – XAMPP access forbidden error
Another error message you might get is the XAMPP access forbidden error, which typically manifests as a 403 error when you try to access your database with phpMyAdmin (or sometimes other pages).
Typically, this happens because of a misconfiguration in one of the XAMPP configuration files.
To fix this, open the main XAMPP app again and click on that same Open Application Folder button. Then, go to the etc/extra folder.
Once there, open the httpd-xampp.conf file with a simple text or code editor.
Look for a line of code that starts with Alias /phpmyadmin.
Within that code block, you should see a line that says Require local. Change that line to say Require all granted instead. Like so:

That should fix the database access error.
What about multisite or staging?
How to install XAMPP and WordPress multisite
If you want to play around with WordPress multisite, it’s also possible to configure that to work on your local host. Rather than duplicating information, though, I’ll just direct you to Vishnu’s post on how to do it.
Should you use XAMPP and WordPress for staging?
While running WordPress on your localhost is a great way to experiment, develop, and test things with WordPress, it’s not the same as a hosted staging site for a live site.
That’s because it has a different hardware configuration than your live site. So just because something works or doesn’t work on your XAMPP WordPress install doesn’t mean it will be the same on your live production site.
Instead, use localhost for development and isolated testing, and use your host’s staging service when you need a more production-like server setup. Or, alternatively, you can set up a staging site directly within WordPress. Here’s a guide on how to do that.
Wrapping things up on how to install WordPress locally on XAMPP
Once you learn how to install XAMPP for the first time, you can quickly spin up new test sites whenever needed.
👉 If you’re interested in some other ways to create local WordPress development sites, we also have a lot of other useful guides:
Do you still have any questions about how to install WordPress locally with XAMPP? Let us know in the comments!

FREE GUIDE
4 Essential Steps to Speed Up Your WordPress Website
Follow the simple steps in our 4-part mini series and reduce your loading times by 50-80%. 🚀


took me a few trys, the 403 error was a trial and error correction. I also restarted my computer. one of the things that threw me was that the folder name “testsite” and the database name “testsite”. I did not use the same names. In step 5 you have the user put in the FolderName, however I used the database name. I used the Database name because it says in Step 4 to create a database name and remember it because you will use it in the next step. I hope this makes since to others of what I did wrong. I would like to commend the author for presenting such thorough steps and display of screens. I am looking forward to learning how to develop a website and experiment on local pc. Thank you Colin
Even a toddler will get this done with ease following your steps. Thank you for this great work!
Hi Colin, pls I need the most suitable WordPress theme for e-library.
Great article. Really helpful. xampp is much easier to work with than wamp so far.
how do it get this to be internal at a small company, so that everyone can access?
Thank you, great explanation
The program can’t start because api-ms-win-crt runtime-l1-1-0.dll is missing from your computer. Try reinstalling the program to fix this problem..
what can i do over this problem
Thank you! That was so clear and easy to follow.
This is great, very well explained
How to setup local Host website on Windows & Mac
By the way, I perhaps should have mentioned that I’ve created the three pages I need using just HTML and CSS. All I need WordPress for — if I need it at all? — is to install MosterInsights’ Google Analytics.
I’m trying to get WordPress running with a local server on Windows 7 using XAMPP. I get Apache to turn green in the XAMPP v3.2.2 Control Panel, but installing MySQL gets “Attempting to start MySQL service…” three times and nothing more. MySQL does NOT turn green. Any ideas? I would strongly prefer replies or notification of replies to smuchnick@comcast.net, which is my primary email address.
Could I have some help getting past the position shown in photo added?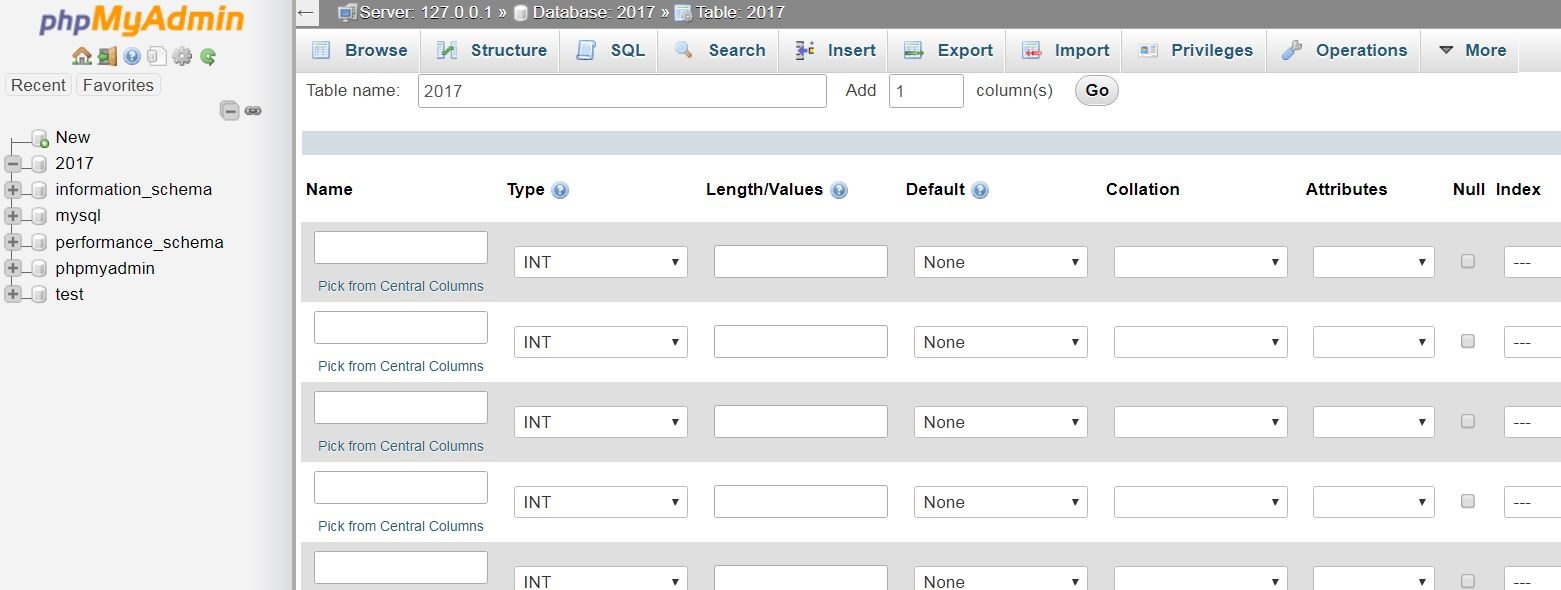
I am trying to install WordPress following the instructions above. I have name my “testsite” to be 2017… I am seeing the pictured page at the start of step 5….
thank you so much it work you told
thank you for help, but i am having some issue 🙁 it is saying:
“We were able to connect to the database server (which means your username and password is okay) but not able to select the (nameofmydatabase) database.”
please help 🙁
did it show up before installing wordpress? if so just reinstall xampp. it took me whole day o find this solution 🙂
Thank You for sharing such a great information with us. If you really want to run your wordpress website in smooth environment then setup wordpress on localhost using XAMPP as it is the best solution you have. It gives you an option to play with themes and plugins as well. While researching to work on localhost using xampp i have found two great resources through which anyone can easily learn to work on localhost.
http://www.wpbeginner.com/wp-tutorials/how-to-create-a-local-wordpress-site-using-xampp/
https://www.wpblog.com/launch-wordpress-localhost-using-xampp/
very well written. Thanks for the information.
Best WordPress/Xampp install instructions I have found on the web.