

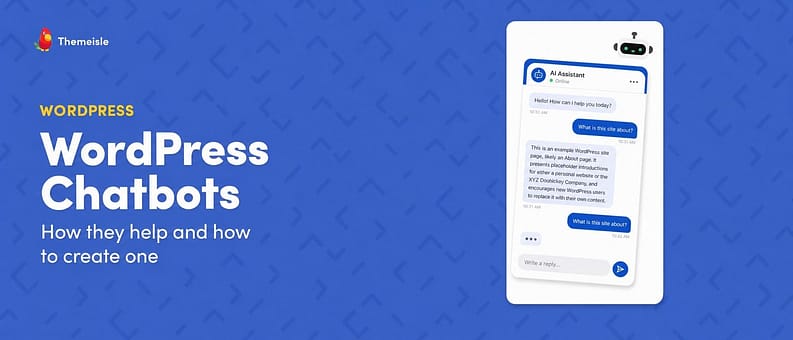
The fastest and easiest way to add a chatbot to your WordPress site is with Hyve, a free WordPress chatbot plugin. It offers enough bandwidth for most light-traffic sites, including personal blogs, smaller ecommerce stores, and sites representing a local brick-and-mortar business. If you have more extensive needs, it also offers a reasonably priced Pro version with a much higher monthly cap on chats, plus additional power features.
Aside from Hyve, two other fallback chatbots you can use are WPBot and MXChat. These have more setup friction than Hyve, but they have their own strengths that might make them a better fit for some websites. To help you decide which one is right for you, I’ll review all three below. Afterwards, I’ll walk you through how simple it is to get started with Hyve. Here’s what you can expect:
Three plugins that let you add chatbots to your WordPress website 🔌
1. Hyve
First up, we have Hyve. As far as ease of use goes, Hyve couldn’t be more beginner-friendly. With a two-step startup wizard, going from installing the plugin to having a live chatbot on your site can be measured in minutes.
It’s the only WordPress chatbot I’ve personally used that doesn’t require you to provide your own API key to activate AI-powered conversations. That feature alone is a needle mover. You still have the option of using a specific AI model (e.g., Claude Opus 5) if you want to go through the extra steps, but Hyve’s native AI feature eliminates it as a requirement.
Key features ⚙️
- 500 messages per month on the free plan; 10,000 per month in Pro.
- AI functionality is built-in so you’re not required to provide your own API key (but you can if you want).
- Your existing site content syncs with Hyve automatically to “build its brain.”
- When Hyve sources an answer from a published post or page, it gives a link to it in the reply.
- Chat history shows the three most recent chats on the free plan, and all previous chats on the Pro plan.
- Learn what visitors ask most, how often a specific question comes up, and get a list of any questions Hyve was unable to answer (only on the Pro plan).
- Send chat activity and captured leads to any URL as signed JSON events (only on the Pro plan).
- Customize Hyve in various ways, including its name, avatar, color scheme, and tone (only on the Pro plan).
Pricing 💰
Hyve comes in a free version called Hyve Lite. Otherwise, you can upgrade to Hyve Pro for a one-time fee of $99, which lets you use it on one WordPress site. If you run a multi-site operation, there’s an Agency option that supports up to 50 websites. It costs $279 and is also billed as a one-time fee.
Hyve was built and is maintained by the Themeisle team.
2. WPBot
Next, let’s look at WPBot, which in some ways offers the opposite experience of Hyve. Its user interface is much busier and doesn’t have the same quick onboarding process, but if you have the patience, the reward is a highly capable chatbot with some unique features.
For example, WPBot lets you toggle on something called “DialogFlow,” which is an AI Engine that can detect user intent and respond accordingly. It also offers several ways to personalize your chatbot, including the ability to change themes and upload custom icons. Overall, it’s an excellent tool; just be prepared to spend a little more time learning the ropes.
Key features ⚙️
- Power your chatbot using numerous popular AI services (e.g., OpenAI, Anthropic, Google DeepMind, Meta, Mistral, Cohere, xAI, Perplexity AI, DeepSeek, and more).
- Add custom icons and edit your chatbot’s colors to match your brand.
- Provide links to relevant web pages on your website with all GPT responses.
- An optional toggle lets site visitors like, dislike, share, and report your chatbot’s responses.
- Show visitors a list of frequently asked questions created by you.
- Let users email you or leave their phone number for follow-up.
Pricing 💰
WPBot is a free plugin with an optional Pro upgrade. There are three Pro plans with two billing options. You can either pay a one-time fee for lifetime access or pay annually as a subscription instead. The entry-level Starter plan costs $39 on the annual plan or $149 if you want lifetime access. It lets you use WPBot Pro on a single website. The rates go up from there.
3. MXChat
Finally, we have MXChat, which has a really aesthetic modern interface and most of the same features as Hyve and WPBot.
MXChat gives you multiple ways to add a chatbot to your site. You can automatically enable it on all pages across your website, or you can use two different shortcodes to add it to specific pages as either a floating widget or an embedded chat. It also supports “streaming chat,” which signals to whoever your chatbot is communicating with that a response is being typed in real time.
To get started, just install and activate the plugin and then head to the six-step onboarding wizard.
Key features ⚙️
- Supports 100+ AI models, including OpenAI, Anthropic, Google Gemini, xAI Grok, DeepSeek, and more.
- Build your chatbot’s knowledge base from WordPress pages, posts, WooCommerce products, custom post types, PDFs, Word documents, text files, sitemaps, and manual Q&A entries.
- Customize the following: colors, chatbot icon, AI avatar, chat bubble size, light/dark/system themes, positioning (left/right), greeting messages, placeholder text, and widget layouts.
- Chat transcripts and the optional debug panel tell you which pages, posts, products, or Q&A entries the AI retrieved and used to generate each response.
- Turn on “web search,” which allows the chatbot to search the web for current information (only on specific models).
- Role-based access controls let you restrict your chatbot to logged-in users only, specific user roles, or you can keep it public.
Pricing 💰
MXChat comes in both a free version and a Pro version. The latter’s sticker price is a one-time fee of $69.97, but the developers behind the plugin often have discounts running. If you happen to catch a sale, it usually reduces the price to $59.47.
How to add a WordPress chatbot to your website using Hyve 💡
Now that you have a few options to work with, I’m going to use one of them – Hyve – to show you how easy it is to add a chatbot to your WordPress site.
Step one: find, install, and activate Hyve
Getting started with Hyve is straightforward and works just like using any other WordPress plugin:
- From the WordPress dashboard, go to Plugins → Add Plugin.
- Use the Search Plugins window to type ‘Hyve.’
- Wait for Hyve to populate. Then click Install Now.
- Wait a few seconds while it installs, and then click Activate.

Step two: connect Hyve to AI
Once you’ve activated Hyve, you’ll be sent to the Hyve Dashboard, where you’ll encounter the shortest setup wizard ever.
Either click Connect to AI (the fastest option), or if you prefer to use your own AI account with OpenAI, Anthropic, or another provider, then click Use your own API key instead:

Assuming you choose the fast route, the next micro-step is just to click Enable Hyve Connect:

With that out of the way, you’re ready to load up your chatbot’s brain.
Step three: add WordPress posts and pages to chatbot knowledge base
The free version of Hyve lets you import your WordPress pages and posts into its knowledge base. If you upgrade to Pro, you can also use custom data, website URLs, sitemaps, and other kinds of documents like PDFs, Word files, and more.
So, if you’re using the free version, there’s only one option here. Click on WordPress under the Add a source section:

On the next page, you’ll see Hyve populate your existing WordPress Pages and Posts. You can add them to Hyve’s knowledge base individually or in bulk:

- To add them individually, use the Add button on the far right.
- To add them in bulk, use the checkboxes on the far left. After you’ve checked off the ones you’d like to add, click Add [Total Checked] to the Knowledge Base.
By default, your Knowledge Base is limited to a maximum of “500 chunks.” To extend this limit without having to upgrade to Pro, read this tutorial on how to integrate Hyve with Qdrant.
Step four: customize chatbot behavior and default messages
Most of Hyve’s customizations are paywalled behind the Pro version, but there are a few you can adjust in the free version. To access them, go to Settings in the Hyve dashboard. Here, you’ll be able to choose where your chatbot appears on your website.
The default setting is for it to appear on all pages, but you can change that to only selected content, everywhere except selected content, or not to show automatically at all:

If you choose the very last option, then you’ll need to add Hyve manually by using shortcodes. You can use either [hyve] or [hyve floating="true"]. The first inserts Hyve as an inline chat on the page, while the second adds it as a floating bubble.
For both, you’ll first need to add a shortcode block to whatever page or post you want the chatbot to appear in.
💡 Beginner tip: The shortcode block is a basic WordPress block that’s available inside the standard block editor. Either type “/” on your keyboard followed by “shortcode,” or click the + button inside the editor and type “shortcode” into the search bar. Then just paste whichever one of the two shortcodes you prefer to use:

👉 Read more about how to use shortcodes in WordPress.
At the bottom of that same section in Settings, you’ll also find two toggles:
- One is to enable source links, which makes it so that your chatbot includes links inside conversations. This is helpful because it gives customers and potential customers confidence that the chatbot didn’t just hallucinate an answer, and they can check it for themselves.
- The other is a standard privacy notice that serves as a privacy opt-in for users who interact with your chatbot.

It’s nothing complicated. You either enable them or leave them disabled.
Step five: customize chatbot appearance and toggle timestamps
The next step is minor. From Settings, click on Appearance on the left-hand side menu. Most of the options here are paywalled. However, there are two things you can adjust in the free version of Hyve:
- Whether you want your chatbot to appear on the left side of the screen or the right side of the screen.
- Whether you want to enable timestamps inside conversations.

Timestamps are enabled by default. If you change anything here, be sure to click on the blue Save changes button. Otherwise, feel free to move on to the last step.
Step six: toggle the one-click option for adding posts and pages to the knowledge base
The final minor step is a forward-thinking one, and I suggest you do it. At the bottom of the Settings menu is a PLUGIN line, with only one section called General. Click on that and then toggle on the Add to Hyve row action:

This will modify your Pages and Posts area in the WordPress dashboard by inserting an option into every line item action menu. It makes it easy to manually add any post or page to your chatbot’s knowledge base.
And that’s the entire process. Now that you see how easy it is, you can add a chatbot to your WordPress site, too.
Why add a chatbot to your WordPress website? 🤖
Before modern AI, chatbots on websites were used in very narrowly defined ways, none of which included genuine customer support. They were mainly a way to answer FAQs and capture leads for follow-ups. It’s a completely different story now.
With the power of large language models and modern AI tools, chatbots can serve as a genuine point of contact for customer support. They might not be able to solve every single customer problem, but with a well-documented knowledge base, they can solve enough to reduce the support workload on the human side. For a small business owner or blogger wearing many hats, it frees up time to work on other things.
In addition to the above, chatbots let you do the following:
- Direct visitors towards important information or a Call To Action (CTA).
- Collect data from and about your audience.
- Introduce an element of fun and personality into your website.
This is why adding a chatbot to your WordPress site is a smart move.
Last word on WordPress chatbots 💬
Adding a chatbot to your website is like hiring a part-time employee. Your chatbot can welcome visitors, answer some of their basic questions, and direct them to wherever they need to go (such as your contact page). This is a smart, easy way to improve the user experience on your site.
To create WordPress chatbots, you’ll need a dedicated solution. Here are a few you can try out:
- Hyve: the fastest way to add a working chatbot to your WordPress site for free.
- WPBot: slower onboarding in exchange for more features and customization options.
- MXChat: a good middle ground between the first two, with additional SEO and AI content features.
Do you have any questions about how to use WordPress chatbots effectively? Drop us a line in the comments section below!

FREE GUIDE
4 Essential Steps to Speed Up Your WordPress Website
Follow the simple steps in our 4-part mini series and reduce your loading times by 50-80%. 🚀


