

If you’re running a website, you know that customer queries can take up a significant amount of your time. The solution? A WordPress FAQ section.
By adding a Frequently Asked Questions section to your WordPress website, you can create a centralized hub to address all the common questions, issues, or concerns that your audience might have. This not only makes your website more user-friendly but also establishes you as an authority in your field. It will also save you time answering countless emails that all contain the same questions.
In this article, you’ll learn 👨🎓 how to add an FAQ section to your website in two ways:
👉 With the free Otter Blocks plugin if you use the native WordPress block editor and full site editing (FSE).
👉 With the free Quick and Easy FAQs plugin if you want a shortcode-based option, use the Classic Editor, or build pages with another builder like Elementor or Divi Builder.
Whether you’re a WordPress novice or a seasoned veteran, by the end of this article, you’ll know exactly how to create informative FAQ sections to enhance the user experience of your site visitors. 😎
Let’s get started!
How to add an FAQ section to your site in two ways
Below are the two easy ways to add an FAQ section to your site depending on which version and functionality of WordPress you are using. We wrote step-by-step tutorials on each of the two methods, which you can follow below:
- Add an FAQ section with Otter Blocks (via the WordPress block editor)
- Add an FAQ section with Quick and Easy FAQs
Quick steps
- Choose Otter Blocks if you build pages with the WordPress block editor and want to add an FAQ block directly inside the editor.
- Choose Quick and Easy FAQs if you prefer shortcodes, use the Classic Editor, or want to place FAQs inside another page builder.
- Install and activate your chosen plugin from Plugins > Add New.
- Create your questions and answers, then customize the layout or styling to match your site.
- Publish or update the page so your FAQ section appears on the front end.
1. How to add an FAQ section with Otter Blocks
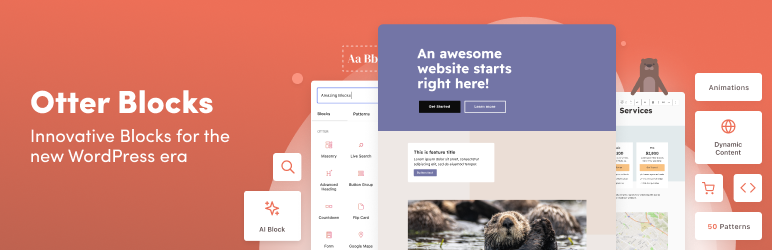
👉 Otter Blocks is a free plugin that comes with various blocks that add new functionality and design styles to your WordPress site. One of these functionalities is the FAQ block, which you can insert wherever you want and customize to your liking.
The big advantage of choosing this plugin is that, apart from the FAQ block, you also get many other different functionalities such as contact form, pricing table, product review, popup, tabs, maps, and more. This way, you can enhance your site by installing one single tool.
Here’s how to use Otter Blocks to add an FAQ section to your website:
Installing Otter Blocks
It’s simple to install Otter Blocks because you can do it right from your WordPress dashboard:
- Go to Plugins > Add New
- Search for Otter Blocks
- Click Install Now
- Click Activate after WordPress installs the plugin for you

Setting up Otter Blocks
Once the plugin is installed, go to the page or post where you want to insert an FAQ section. Click on the + icon and search for “Otter Accordion”. Click on it and once it shows up on the page, you can start customizing it.

To change the text, simply click on each box to add your own questions and answers.

In order to change the styling and add visual elements to the FAQ section, select the full block by clicking on the Select parent block: Accordion icon.

To the right side of the screen, you will see the settings available to customize the way the entire box will look. From here, you can choose the position of the expandable icon and whether to keep multiple items expanded.

Also, you can enable FAQ Schema with Otter by clicking on a toggle. This can still help add structured data to your content, but most websites should not expect Google to show FAQ rich results in search because those rich results are now largely limited to well-known government and health sites.

From the Style tab, you can customize the looks of the accordion, such as typography, font, color, icons, and borders. You can also write additional CSS code for advanced styling.

To add a new item (a new question and answer), click on the Add Accordion Item button at the bottom left of the block. You can insert as many items as you want.

When everything is ready, update the page/post. This is how it looks on the front end:

2. How to add an FAQ section with Quick and Easy FAQs

👉 Quick and Easy FAQs is a free plugin that lets you:
- Add an FAQ section anywhere on your site using a shortcode.
- Choose from different styling options to make your FAQ section match your site’s design.
Here’s how to use it to get up and running with your WordPress FAQ section:
- Install Quick and Easy FAQs
- Set up Quick and Easy FAQs
- Display a WordPress FAQ section on your website (three layouts)
Installing Quick and Easy FAQs
Because Quick and Easy FAQs is listed at WordPress.org, it’s easy to install on your website:
- Go to Plugins > Add New
- Search for Quick and Easy FAQs
- Click Install Now
- Click Activate after WordPress installs the plugin for you

Setting up Quick and Easy FAQs
Once the plugin is installed, you can use the Quick and Easy FAQs editor to start writing your questions and answers.
Writing the questions and answers
From your WordPress dashboard menu, select FAQs > Add New.

A new page entitled Add New FAQ will now open. Here you can create your first frequently asked question. Type the question in the Title box. Then write the answer in the content area below.

Once you are happy with your FAQ, select Publish. To write additional questions, just repeat the same process. You can always find a full list of all your questions and answers by clicking on FAQs in your WordPress dashboard menu.
Creating an FAQ group
👉 If you have a lot of FAQs, you might want to group them into different sections so that:
- You can use different FAQ lists on different pages
- Your visitors can more easily find questions that address certain areas
To create an FAQ group, go to FAQs > Groups:

Give your group a name, a relevant slug, and a description. Then click Add New FAQ Group at the bottom. You can repeat the process to create multiple groups.
Assigning an FAQ to a group
To assign an FAQ to a group, you will need to individually edit each FAQ that you have created. To do so, click FAQ from the WordPress menu. Select the FAQ you would like to add to the new group and then click on Quick Edit.

Here, under FAQ Groups, you can select the appropriate group and then click Update.

Alternatively, for each new FAQ you create, you can immediately add it to a group from within the FAQ Editor by using the FAQ Groups option on the right side:

Displaying a WordPress FAQ section on your website
Once you’ve finished adding your FAQs, the next step is to actually display them on your site so that your visitors can read them.
To do this, you can use a shortcode to add FAQs, or an FAQ group, in three different layouts…
- List Style
- Toggle Style
- Filterable layout
You can find all the shortcodes variables at the Quick and Easy FAQs plugin page, but we’ll also show you some of the most common uses below.
Displaying an FAQ section in a List Style
To insert your FAQ, you just need to add the [faqs] shortcode to any post, page, or text widget:
![Adding the [faqs] shortcode to a WordPress page or post](https://mllj2j8xvfl0.i.optimole.com/cb:c5QE.37290/w:auto/h:auto/q:eco/f:best/https://themeisle.com/blog/wp-content/uploads/2026/04/Adding-the-faqs-shortcode-to-a-WordPress-page-or-post.png)
The default [faqs] shortcode uses the list style. A user can click on any question and will then be taken down the page to the specific question and its answer.

Other List Style shortcode options include…
Displaying an FAQ section in a Toggle Style
A Toggle Style creates a professional looking FAQ section. Here a user can toggle between the questions and answers, easily viewing all questions and opening each answer when needed.

Here are the four shortcode options for displaying an FAQ section in a Toggle Style…
Displaying an FAQ section in a Filterable Toggle Style
If you want visitors to filter FAQ groups on the front end, use the plugin’s filter parameter together with a toggle or accordion layout instead of a separate filterable-toggle style value.

Groups are kept separate, so users can switch between groups, as well as toggle between questions and answers. This ensures your FAQ section remains organized, providing a user-friendly layout.
📺 To display your FAQ groups in a filterable layout, add a shortcode such as [faqs style='toggle' filter='true'] or [faqs style='accordion' filter='true'] to the appropriate page or post.
Final thoughts on how to add a WordPress FAQ section to your site 🏁
As you can see, Otter Blocks and Quick and Easy FAQs are extremely useful plugins. These tools let you add FAQs to your site in different ways, depending on which method you use to build and edit your overall site:
- If you use the WordPress block editor, Otter Blocks will help you add an FAQ section in an easy way via the Accordion block.
- If you prefer a shortcode workflow, use the Classic Editor, or customize your site with a page builder like Elementor, Quick and Easy FAQs is the alternative.
💡 For a more comprehensive solution, you might also want to consider adding a knowledge base to WordPress.
Quick comparison
- Otter Blocks: Best if you want a native block-editor FAQ experience with accordion styling and optional FAQ schema markup.
- Quick and Easy FAQs: Best if you want shortcode-based placement, Classic Editor compatibility, or flexible use inside page builders.
- Schema note: Adding FAQ schema can still structure your content, but most sites should not expect Google to show FAQ rich results.
Have you used a different WordPress FAQ plugin that you would like to recommend? If so, please share your thoughts in the comments below.

FREE GUIDE
4 Essential Steps to Speed Up Your WordPress Website
Follow the simple steps in our 4-part mini series and reduce your loading times by 50-80%. 🚀


Hi Megan. I set it up using your guide but something i cannot figure out is arranging the faqs in an order i want. I wrote out the most important one that i would like my users too see first. Then i wrote out another one and it goes to the top and i cant for the life of me figure out how to arrange them in an order i would like. Any ideas?