

If you’re Googling phrases like “how to screenshot on computer”, you’re probably stuck in that unfortunate situation where you want to take a screenshot of something on your computer but you don’t know quite how to do that.
Good news – it’s super easy to take screenshots on your computer. And we’re going to show you exactly how to do it using built-in functionality for both Windows and Mac.
Then, we’ll also share some good third-party screenshot tools and how to upload the screenshots that you take to your WordPress site.
How to take a screenshot of your computer for Windows and Mac
There are easy-to-use native screenshot programs on both the Windows and MacOS operating systems.
If you don’t like the look and feel of these programs, you can use an external app or tool to take your screenshots as well.
We’ll discuss all your available options in this section!
How to take a computer screenshot on Windows
If you’re a Windows user, the absolute simplest way to take a screenshot of your entire screen area is with the Print Screen button, which is usually on the top right on most keywords. You can then use the Ctrl + V keyboard shortcut to paste the image.
However, this method doesn’t give you any control over what you take a screenshot of, so you’ll probably be happier using Windows’ built-in Snipping Tool.
You can open the snipping tool by searching for “Snipping Tool” under your programs.
Once you’ve opened the Snipping Tool, you can take a screenshot by clicking the New button and clicking and dragging to select the area that you want to screenshot:
You’ll then be able to add some basic annotation options from the Snipping Tool interface. And you can click the floppy disk icon to save your screenshot:

If you’re creating a tutorial for your website visitors, you’ll find the “Delay” option particularly useful.
Say you’re walking your visitors through how to use Google’s Keyword Planner tool, for example, and you need to instruct them to click on “Tools” and select “Keyword Planner” from the drop-down menu.
To do this, simply select “Delay: 2 Seconds” on your Snipping Tool.
Then navigate back to your Google Ads dashboard, click on “Tools”, and wait for the Snipping Tool to capture that drop-down list.

How to take a computer screenshot on Mac
Taking a screenshot on a Mac computer is also simple.
If you want to capture a screenshot of your entire screen, press “Shift + Command + 3”.
If you want to capture a portion of your screen, press “Shift + Command + 4”. From here, click and drag the pointer to select the area that you want to screenshot.

Last but not least, if you want to take a screenshot of a particular window, press “Shift + Command + 4” and the spacebar on your keyboard at the same time.
When you do this, your pointer will morph into a camera icon.
From here, drag the camera icon on a window, then highlight and capture it.
To access your screenshots, head to your desktop. All your screenshots will be saved here, with their capture date as their filenames.
Want more flexibility? Consider a dedicated screenshot program
If you want more flexibility – like the ability to annotate your screenshots in more depth or blur certain content – you’ll probably be happier with a dedicated screenshot tool rather than using your operating system’s built-in functionality.
Our favorite tool is Greenshot – you can download it here.
Once you’ve installed the tool, Greenshot should start up immediately.
All you have to do is click on the “Print” or “PtrScr” key, and you’ll see a crosshair that you can use to capture a screenshot.
After you capture your screenshot, Greenshot will prompt you with these options:

You can either save your screenshot or open it with Greenshot’s image editor.
The image editor allows you to crop your screenshot, add text to it, and highlight parts of it. You can also add arrows to embellish your screenshot:

Pretty cool, right?
LightShot is another good option that works on both Windows and Mac. Many Mac users swear by Shotrr, as well.
How to add a screenshot to a WordPress site
Now that you know how to screenshot on your computer, let’s talk about how you can add a screenshot to your WordPress site.
If you’ve ever added a picture to a WordPress page or post before, you’ll find adding a screenshot easy – the process is exactly the same.
From your WordPress dashboard, navigate to “Posts > Add New”, then click on “Add Media”.

From here, click on “Upload Files” and “Select Files”. Select your screenshot and wait for it to load.

Finally, click on “Insert into post”. That’s all there is to it! 🤩
💡 Pro Tip: Make sure you add a description to the “Alt Text” field in the sidebar on the right. This helps Google and other search engines index your images, driving more traffic to your site.
🎁 BONUS: Make sure your screenshots load fast on WordPress
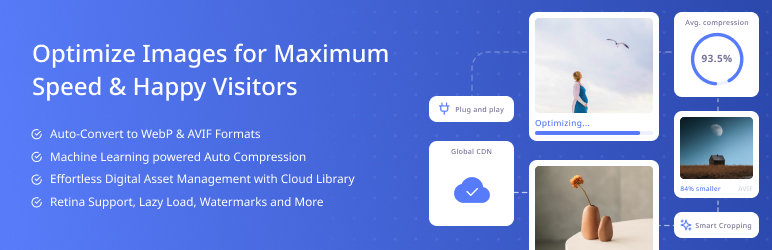
To make sure that your screenshot images don’t slow down your site’s load times. you should optimize all your screenshots so that they load as quickly as possible. While we’ve written guides on how to optimize WordPress images and use compression plugins, a simpler way is to just use the all-in-one Optimole plugin, which handles implementing all of those tips for you:
A final word on taking screenshots for your WordPress site 🏁
You know what they say: a picture is worth a thousand words.
If you ask us, a screenshot is worth even more!
It’s time to bring your site into the 21st century and make it more user-friendly by adding screenshots wherever they’re relevant.
Try out the various methods we listed above, and let us know which one works best for you!
Have any other questions about how to take screenshots? Let us know in the comments.

FREE GUIDE
4 Essential Steps to Speed Up Your WordPress Website
Follow the simple steps in our 4-part mini series and reduce your loading times by 50-80%. 🚀


