
As a writer, I optimize images all the time. Sometimes, my clients already have some image optimization plugins installed (and that’s great!), but I’ve seen that not all those plugins are created equal. You’ll often find that some perform a lot better than others…even though every one of them will actually tell you that they’re, in fact, “the best.”
To cut through the marketing noise, I embarked on extensive testing to compare the most popular WordPress image optimization plugins and determine which truly stands out. Stay tuned for my testing methodology and the conclusive results.
My testing methodology to find the very best image optimization plugins
I first started with the most popular image optimization plugins from the WordPress directory. Picked about 10 of those. Then, I narrowed my list down to only five that I found worthwhile when compared against each other.
Those were the plugins that offered respectable compression rates for multiple formats, easy configurations, additional image delivery features that also had a perceived impact on their optimization, and free image processing with the option to upgrade for more features.
Here’s the final lineup I ended up with: ShortPixel, Imagify, Optimole, EWWW and Smush.
I then took a four-step approach to testing these plugins, and that focus allowed me to address a few issues I have with similar tests I’ve found online. Those tests often fail to acknowledge the complexities of images, particularly those used online. My four-pronged process helps to create a realistic test environment while also embracing the randomness of images by throwing everything I can at these image optimizers.
The steps in my test:
1. I picked five PNG images and five JPG images to test with each plugin
There are dozens of image formats, and the images themselves vary drastically in their digital makeup; some have more pixels than others, or lots of detailed items like trees and rocky crevices, or a focus on certain colors like black and white or neon shades.
2. I made sure the images varied considerably
To account for the fact that every image is so unique, I created a sampling of images with stark differences in their colors, details, and styles.
I chose:
- A black-and-white photo
- A painting
- Bright, neon-colored 3D art
- A modern “normal” photo of something outside
- A picture taken on a camera phone
- Close-up, high-resolution portrait photography
- An AI-generated image
- A screenshot of a detailed website with text included
- A “boxy” presentation slide with lots of right angles and text
- An image with very thin foreground elements and a transparent background
I also randomly varied the starting sizes of those images to create a realistic testing experience. After all, sometimes you’ll be optimizing a small 600×426 pixel photo, while other times you may start with an extra large image at 6,000×4,000 pixels.
I’ve found that some plugins work wonders with 20-kilobyte images that are only 1,000×1,000 pixels.
But when you really need it, for an image that’s 6,000×6,000 pixels and weighing in at dozens or hundreds of megabytes, those same optimizers either completely skip the task or really struggle.


3. I uploaded the images to a WordPress site with different image plugins enabled
Finally, I wanted to consider more than just simple compression percentages. So apart from that, I also looked at each plugin’s effects on site performance overall.
Sure, it’s nice to see that you can shrink an image by 90%, but the real optimizers add extra features into the mix – like content delivery networks, automated cropping, and lazy loading – to give you even better performance when uploading them to your website. That’s why I also tested performance metrics of the website after adding each image by itself to the homepage of a WordPress site.
To ensure consistency across each website performance test, I used:
- A new WordPress installation
- A managed web host with a datacenter in Iowa (near me), with a CDN (content delivery network), and Edge caching
- The Twenty Twenty-Four Theme
Throughout the evaluation, I swapped out the main banner image from Twenty Twenty-Four with each test image. I then ran performance tests with each image on the homepage using Google PageSpeed Insights.

With the stats from each optimizer, my own manual checks, and results from PageSpeed Insights, I gathered the following information for each uploaded image:
- Compression percentage of the image (shown in each optimizer plugin and double checked with manual calculations): This shows the percentage of space saved after the image optimizer plugin compressed it automatically. For instance, an optimizer plugin may decrease any image’s size from 500 kilobytes to 100 kilobytes, resulting in an 80% decrease.
- Mobile performance score (Google PageSpeed Insights): Google uses a weighted performance score (called the Lighthouse Score) which combines multiple metrics – first contentful paint, speed index, largest contentful paint, time to interactive, total blocking time, and cumulative layout shift – to establish a nice round number as a reflection of your site’s performance. The highest score is 100. This particular score is only for mobile devices.
- Desktop performance score (Google PageSpeed Insights): This is the same as the previous performance score but when the site runs on desktop devices. Scores are generally higher on desktops, but it’s very important to look at both because an image optimization plugin that struggles with mobile or desktop would cause issues for your load times.
- Largest contentful paint on mobile (Google PageSpeed Insights): The largest contentful paint (LCP) measures the perceived loading time of the main content on your page. Another option is “first contentful paint,” but I’ve found that images tend to affect LCP the most, seeing as how they are often the largest elements on a page. In my testing, I measured the LCP on mobile devices first. The goal is a faster time, so one second is better than two seconds.
- Largest contentful paint on desktop (Google PageSpeed Insights): This is the same as the previous LCP but for desktop devices, which almost always has a faster LCP. Again, the fewer seconds, the better.
4. I gave a point to each plugin with the highest scores in each category for a given image
I wanted a true scoring system that identified the winners of each test. Since I ran every image through each image optimizer, it made sense to award a point for the winner of each category.
A plugin would get one point if it:
- Had the highest image compression percentage for Image 5 compared to how the others compressed Image 5. Or…
- Delivered the fastest LCP time for Image 7 on mobile devices. Or…
- Showed the highest mobile performance score for Image 2.
At the end of the testing, I added up the points to declare a winner. Keep in mind, however, that it wasn’t as cut and dry as the finishing results may state. I’ll also go over some intricacies of the testing, like how some plugins worked much better for PNGs, while others couldn’t handle larger images at all, or how high compression rates don’t necessarily lead to the best page load times.
Note: I wanted to emulate the experience of a casual user. I assume that most people will typically install the image compression plugin and not tinker too much with default settings. This is what I’m interested in most: how each image optimization plugin performs right out of the box without forcing the user to complete any tedious steps, sign up for paid plans, or configure a bunch of settings.
Test results (and what they mean for these plugins)
As mentioned earlier, I took ten images – five PNGs and five JPGs of varying sizes, colors, and styles – and ran them each through five tests using five different plugins for image optimization every time. Starting with image compression, I was able to identify the best-performing optimizer for each image, thus granting the best optimizer a point for each high score on an image.
Image compression winner: Optimole
There’s no doubt about it: Optimole provided significantly stronger image compression percentages than any other plugin I tested. It won for every image, accumulating 10 points.

My observations on the image compression results:
- As you’ll see further in this article, dominating the image compression scoreboard doesn’t always make Optimole the best in terms of website performance.
- Imagify, Smush, and EWWW failed to compress Image 6 and Image 10; this was either because the plugins didn’t allow large images or you needed to upgrade to a higher plan. Either way, that’s a huge downside.
- Imagify and EWWW failed to compress Image 7 because of maximum image size restrictions.
- Smush only uses a more conservative form of compression called lossless compression. If you absolutely must maintain the original quality of your images, it might be a good option. The other ones start with lossy compression, which compresses images much further. Lossy degrades the photos but usually not enough to be noticeable to the human eye (making it ideal for online publishing).
- ShortPixel delivered the most consistent compression rates behind Optimole.
Mobile PageSpeed Insights performance score winner: ShortPixel
ShortPixel won with five points, but all the other optimizers received a few points, too.

My observations on the mobile PageSpeed performance scores:
- Oddly enough, Imagify and Smush performed okay for the images they failed to compress in the previous test. My theory: WordPress, or the mobile test browser, crudely compressed the on-page images to fit a mobile device, so it may have actually helped them. I’d argue that those points shouldn’t be counted since you’re probably not getting the best-quality images.
- Although it received only one point, Optimole is still one of the most consistent for mobile performance; its score, however, seemed to dip for PNG images.
Desktop PageSpeed Insights performance score winner: Optimole and Imagify
Tied for the desktop performance score from PageSpeed Insights are Optimole and Imagify (with five points each).

My observations on the desktop PageSpeed performance scores:
- The scores were higher across the board when compared to the mobile scores.
- Optimole received higher scores after processing PNGs, yet its JPG scores were still respectable.
- Once again, Imagify got decent scores even after it did nothing to some images.
- ShortPixel had the most consistent high scores, only ever dipping as low as 96.
- EWWW showed promise but is tough to love because of its PNG restrictions on free plans.
- Imagify produced better results for most (but not all) JPGs when compared to other tools like Optimole, Smush, and ShortPixel.
Mobile LCP winner: ShortPixel
LCP, or largest contentful paint, measures the speed (in seconds) it takes for the main piece of content on a webpage to load. I used this metric since the “main” and largest content item is usually media, like an image. When loading these images on mobile devices, ShortPixel did it consistently faster than the other WordPress optimizer plugins.

My observations on the mobile LCP scores:
- ShortPixel gained most of its points after compressing PNGs, except for one JPG.
- EWWW and Smush both tallied the fastest speeds on two JPG occasions. EWWW did well with the largest JPG, Image 2.
- Optimole and ShortPixel provided the best results on mobile for one of the largest PNGs, Image 10. ShortPixel also beat out all other WordPress image optimizer plugins with another bulky PNG, Image 6. It seems to do well with larger PNGs when presenting them on mobile devices.
Desktop LCP winner: Optimole
Switching to the largest contentful print (LCP) on desktop devices, Optimole took an early lead and never lost its edge.

My observations on the desktop LCP scores:
- Optimole did well on both mobile and desktop interfaces, but it truly excelled in the desktop arena.
- Imagify continued to handle JPGs nicely, along with a surprise win with the Image 8 PNG.
- ShortPixel clearly does better when optimizing images for mobile devices. Its desktop scores were too slow across the board.
The grand prize goes to…Optimole!
My points system correlated rather well with the averages from each category.

With the final scores, here’s how I would rank the best image optimizer plugins for WordPress:
- Optimole: Total score of 25 points, #1 in image compression, #1 desktop PageSpeed score, and #1 desktop LCP; its mobile LCP and PageSpeed scores were on the lower end, but still respectable.
- ShortPixel: Total of 11 points, #1 mobile PageSpeed score, and #1 mobile LCP. It had excellent numbers in all categories, but it didn’t win, either. It’s also the only other plugin, besides Optimole, that doesn’t have ridiculous restrictions on image sizes or formats.
- Imagify: Total of 10 points and tied at #1 for desktop PageSpeed score. Although it restricts you with image size limits, Imagify optimizes JPGs very well. It also looks pretty solid when optimizing images for mobile devices.
- EWWW: Total of 9 points; didn’t win any categories. It still offers impressive desktop optimization and LCP scores.
- Smush: Total of 6 points; didn’t win any categories. It’s still a great choice for WPMU DEV users, who get all of that developer’s plugins for one price.
Note: Your results may vary depending on the type of compression used by each plugin. For instance, most image plugins have a default compression level: lossy or lossless. Sometimes the plugin lets you change the default setting to something else. Lossy compression usually produces the smallest image sizes without losing noticeable quality, but it does remove physical parts of the image, potentially making it less appealing if you must have a version that’s close to the original. If that’s the case, lossless focuses on removing image metadata; it doesn’t compress an image nearly as much as lossy, but you maintain close-to-original quality.
You’ll see Optimole dominating many of those tests in most of the categories. The reason why that’s the case comes down to a couple of things, but to say it simply, Optimole’s free version gives you much more than the free versions of these other solutions. And I’m not just saying this in marketing terms. It’s basically all about the inner architecture of what Optimole actually is.
At the end of the day, you have two types of image optimization plugins: (1) plugins that have the structure of a classic WordPress plugin (i.e. it’s a script that runs all within your WordPress site), and (2) plugins that serve as a connection layer to a Software as a Service solution (SaaS).
Many of the plugins on this list offer SaaS features, however only as part of their paid tiers. The free tiers are mostly classic plugins. Optimole is SaaS from the start – on its free version too.
But what does it all mean? Is SaaS better? Not by definition. But it does allow Optimole to offer more features, which is the reason why it ends up being faster.
I wanted to draw your attention to it because while this post focuses mainly on image compression, website performance optimization is a complex puzzle with many pieces. Optimole is designed to address this multifaceted challenge head-on through its SaaS architecture.
It can:
- Optimize your images (similar to any other plugin)
- Serve your images from a global CDN for free
- Pick the right image format based on user device (e.g., mobile phone vs laptop)
- Automatically adjust the quality of an image based on user internet connection
- Lazy load without relying on jQuery (jQuery is a less efficient method)
- Use AI to enable “smart cropping”, which maintains an image’s ideal dimensions without sacrificing its focal point
Overall, it’s just a more comprehensive approach to improving website performance.
My final take on the testing
After testing five plugins with ten images, the overall winner is Optimole for overall image optimization and website performance. Coming in second was ShortPixel, which delivered the best mobile performance scores after optimizing images. Imagify was a strong contender, too, mainly for its desktop optimization results. EWWW and Smush offer respectable optimization scores as well, but they have some compression restrictions that can be removed with their premium plans.
Editor’s note: Optimole has been created by the same company that owns Themeisle. The author of this post is not an employee of the company and his testing methodology, results, and conclusions are his own.
With the test out of the way, below is my in-depth comparison of the hands-on experience with these image optimizer plugins for WordPress: 👇
Best image optimization plugins for WordPress IN DETAIL
In addition to performance and compression testing, I want to dive into other aspects of these image optimizer plugins for WordPress, like interface, features and pricing. I’ll also include plugin-specific charts with their optimization scores.
1. Optimole
How’s the Optimole interface? 🤔
My experience with Optimole’s interface has been nothing but pleasant. It’s easy to configure the plugin, and the process only takes a quick setup to acquire an API key.
After linked to the API, Optimole runs smoothly, even in the free edition. The dashboard offers a sleek view of your monthly visit quota, the number of images optimized, saved file sizes, and average compression percentage. I also liked how Optimole provides compression stats for recently optimized images.

From the same page, I was able to jump to the Settings panel. That included a straightforward list of features to consider. Most of the necessary settings are active by default, but I was also able to manage everything easily, from image handling to lazy loading and image storage to the cloud library.

Overall, Optimole is one of the best image optimization tools due to its clean interface, simple setup, and the fact that virtually all optimization happens in the background.
How are the features? ⚙️
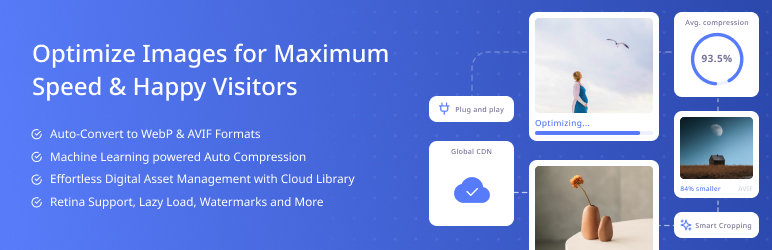
Optimole provides all the features you would expect from one of the best image optimization plugins. Website performance optimization is a complex puzzle with many pieces. Optimole is designed to address this multifaceted challenge head-on, offering features that go beyond only compressing images.
Here are my favorites:
- Unlimited images for all plans
- AVIF support
- Lazy loading without relying on jQuery (jQuery is a less efficient method)
- A Cloudfront CDN with more than 450 locations
- Easy scaling with varying prices for the number of monthly visits your site gets
- Auto-scaling for images
- Instant optimization upon upload
- Image offloading and storage to save space
- Digital asset management
- Instantly optimizing images based on device (e.g., mobile phone vs laptop)
- Automatically adjusting the quality of an image based on internet connection
- Using AI to enable “smart cropping,” which maintains an image’s ideal dimensions without sacrificing its focal point
- Automated metadata stripping which not only helps protect privacy but also reduces image file size

How’s the pricing? 💰
Optimole has a fully-functional free plan and several affordable premium plans in Optimole Pro:
- Free: $0 for up to 2,000 monthly visitors, unlimited images, format-based optimization, cloud library support, smart cropping, digital watermarks, a CDN, lazy loading, digital content management, and more.
- Starter: Starting at $19.08 per month for unlimited sites, unlimited images, 48,000 monthly visits, auto-scaling, Cloudfront CDN, smart lazy loading, AVIF support, machine learning compression, 24-hour customer support, image offloading, and image storage.
- Business: Starting at $39.08 per month, this plan lets you customize your monthly visit volume. The price is for 120,000 visits, but it goes up to three million visits if needed. You get everything from the previous plan, plus custom domain support and added chat support.
- Flexible: Adjustable pricing that supports anywhere from 300,000 monthly visits to 3.6 million; you also get a dedicated account manager.
This pricing makes Optimole suitable for WordPress blogs, businesses of all sizes, and if you want to host your images externally (premium feature). There is also an optional video optimization addon that processes your videos and optimizes them the same as images.
Go to Optimole Test Drive2. ShortPixel Image Optimizer for WordPress

How’s the ShortPixel interface? 🤔
ShortPixel brings you right to its dashboard to connect an API key. You must, therefore, create a free ShortPixel account to begin automatically optimizing your images.
On the dashboard, you can choose a compression type, and decide which of your images you’d like ShortPixel to compress. There are also options for automatic conversions:
When I uploaded a photo to WordPress, it was really easy to see if it had been optimized or not, and by how much. All the ShortPixel compression information gets stored in the Media Library on the WordPress dashboard.

How are the features? ⚙️
I enjoy how most of SmartPixel’s features remain in the background. You configure things like compression type (lossy, glossy, or lossless) and never have to think about them again.
It’s also nice that ShortPixel lets you test each compression type to figure out which is right for you.
Here are some other ShortPixel features I like:
- Options for lossy, glossy, or lossless compression
- PDF optimization
- Smart cropping
- Automatic cropping and resizing
- An option to automatically create WebP and AVIF versions of images
- Auto conversions from PNG to JPEG
- Optimization for thumbnails and retina images
- Cloudflare integration if you’re using a CDN
- Remove EXIF data
- Decide if AI tools can use your images for training
How’s the ShortPixel pricing? 💰
ShortPixel sells a few plans, one of which is free:
- Free: 100 image credits every month.
- Unlimited Monthly: $9.99 per month for unlimited credits, unlimited domains, SmartCompress, WebP and AVIF delivery, smart cropping, and support for all image formats.
- Unlimited Yearly: $99.90 per year; this provides all the same features as the monthly plans, but it’s cheaper in the long term.
They also let you make one-off purchases of image processing credits. These come in packs of 30K, 50K, 100K, and 250K credits and they cost $19.99, $29.99, $49.99, and $99.00, respectively.
I like the free plan for small blogs and business websites, but you will quickly burn through the monthly credits if you have more than 100 images to process. However, the pricing on the paid plans is reasonable, especially if you opt for a one-time or yearly payment plan.
Go to ShortPixel Test Drive3. Imagify

How’s the Imagify interface? 🤔
Imagify’s configuration process is simple enough. You must create an Imagify account to acquire a free API key, which you plug into the dashboard to get started. After that, you only have to worry about two pages in WordPress, one for general settings and another for bulk optimization. Although most necessary settings are already configured, you can change things like auto-optimization, the backing up of original images, and the type of compression.

I also appreciate that – in the WordPress Media Library – you can see how much each image was compressed and then re-optimize with a different compression type (lossy or lossless).

One big downside is that on the free plan, the images you upload have to be no more than 2 MB in size. If you try to upload anything over that, you will get an error message:

How are the features? ⚙️
Imagify packs quite a few features into such a sleek and simple image plugin. You can auto-optimize and bulk optimize, and there’s even a tool for optimizing your WordPress theme.
After thorough testing, here are my favorite features from Imagify:
- Auto-compression after uploading
- Both lossy and lossless compression
- WebP image versions
- Original image backups
- Image resizing
- WordPress theme optimization
- Folder-specific optimization
- Bulk and smart optimization
How’s the pricing? 💰
Imagify pricing has three plans based on the total image size of your monthly uploads:
- Starter: $0 per month for 20 megabytes per month (about 20 images); there’s a maximum upload size of two megabytes (which I saw as somewhat of an issue during my testing).
- Growth: Starting at $4.99 per month for 500 megabytes per month (about 5,000 images) and unlimited upload size per image. It costs $5 for every extra gigabyte.
- Infinite: Starting at $9.99 per month for unlimited images and unlimited upload size.
The pricing from Imagify is fair. I imagine many organizations can get away with the free plan considering the two megabyte image size limit, but I can’t see many websites being able to stay below the 20 megabyte per month total upload limit. So, you’ll almost certainly have to pay for the Growth plan.
Go to Imagify Test Drive4. EWWW Image Optimizer

How’s the EWWW interface? 🤔
I appreciate that EWWW offers both easy and advanced (ludicrous) modes in its WordPress settings. You’re able to install the plugin and have it optimizing in seconds with the easy mode. Simply activate an API key and everything just works. You can also adjust settings for lazy loading, automatic scaling, removing metadata, and resizing images.
The “ludicrous” mode gets a little intense for my taste, but it’s at least broken down into intuitive tabs for easy navigation within this image optimization plugin.

It’s also possible to check the compression and optimization stats in the WordPress Media Library.

How are the features? ⚙️
EWWW doesn’t limit you on image sizes or the number of images optimized, but I do gripe about its restrictions on file types in the free version. Basically, you can only optimize JPGs on the free plan when using the cloud service. PNGs, WebP conversions and many other features are all paywalled or otherwise restricted to local (server-level) optimization. This means that your features will be partly determined by your hosting company and partly by your willingness to pay for a premium plan.
I’ve outlined my notable EWWW features below:
- Optimization of a wide range of formats like JPG, PNG, GIF, PDF, and SVG (limited to JPG in the free version)
- Easy and Advanced modes for settings
- Metadata removal
- Image resizing
- WebP conversion
- Lazy loading
- Scheduled optimizations
- Folder-specific optimization
- Image conversions
- Image sharpening
- Support for unlimited websites

How’s the EWWW pricing? 💰
EWWW has a free version, or you can upgrade for more features (like PNG optimization). Here are the plans:
- Free: $0 for automated cloud-based image optimization (JPGs only), support for unlimited file sizes, metadata removal, image resizing, and automatic scaling.
- Standard: Starting at $6.67 per month for extras like unlimited CDN images, support for all image formats, image watermarking, 50 gigabytes of bandwidth, auto scaling, auto WebP creation, and more.
- Growth: Starting at $13.33 per month for all “Standard” features, custom domain support, 200 gigabytes of bandwidth, and a global CDN.
- Infinite: Starting at $26.67 per month for all “Growth” features, 400 gigabytes of bandwidth, and increased limits on certain other features like API.
My take on the EWWW pricing: It’s reasonable for just about every type of business, big or small, but I still think PNG optimization and WebP conversion should be included in the free plan.
Go to EWWW Test Drive5. Smush
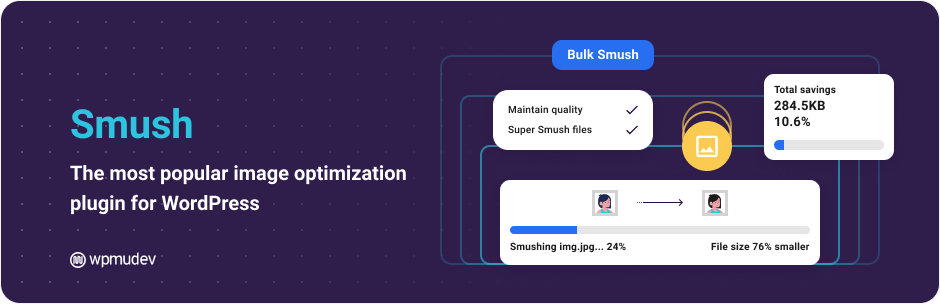
How’s the Smush interface? 🤔
The Smush dashboard is simple enough (showing a total optimization for all images on your site), but I found the plugin a bit cluttered with its long list of pages for settings. The default settings work well, but it took me some time to find the native lazy loading feature. There are about ten tabs you have to sift through for all the settings.
As for checking images, I found it easy to go to the Media Library to see stats about how much each image was reduced.

During my testing, however, it was odd that Smush didn’t automatically process any of the images I already had uploaded to my website. It was fine with new images, but I had to click “Smush” manually for previously uploaded items.
How are the Smush features? ⚙️
The Smush dashboard is simpler to navigate compared to the other image optimizers on this list. This is largely due to how it’s organized, which is that the main features are listed on the lefthand sidebar rather than as a series of tabs on one screen. It makes the user experience feel less cluttered and you can easily sift through the various features like bulk processing, lazy loading, CDN, and third-party integrations:

Speaking of Smush features, these are the ones that stood out during my tests:
- Options for lossless, lossy, or “Ultra” compression levels
- Automatic compression, image resizing, and metadata stripping
- Email notifications for when a bulk compression process is done
- Optimization for specific directories
- Lazy loading (with the ability to exclude media types and post types)
- A CDN that allows for WebP conversion
- Local WebP conversions
- Integrations with apps like Gravity Forms, NextGen Gallery, and Amazon S3
How’s the Smush pricing? 💰
One of the benefits of Smush is that it lets you optimize unlimited images for free. There is just one caveat – individual images cannot exceed 5MB.
To remove that limit, you can use WP Smush Pro.
Here’s what the plans look like:
- Smush Free: $0 for unlimited images; 5MB upload limit.
- Smush Pro Basic: Starting at $3 per month; one site license, unlimited image compression, 5GB CDN, 5GB backup storage, and 24/7 customer support.
- Smush Pro Standard: Starting at $5 per month for everything in the previous plan, plus a total of three site licenses, 10GB CDN, and 10GB backup storage.
- Smush Pro Plus: Starting at $10 per month for everything in the previous plan, plus a total of 10 site licenses, 20GB CDN, and 20GB backup storage.
- Smush Pro Premium: Starting at $20 per month for unlimited sites, unlimited image optimization, 50GB CDN, and 50GB backup storage.
I like the Smush pricing if you already use some of the WPMU DEV products, or if you’d like a great deal on multiple WordPress development products, since the subscription comes with about 12 other WPMU DEV products, including Defender Pro (security), Hummingbird Pro (performance optimization), and Forminator Pro (forms).
Go to Smush Test DriveWhich WordPress image optimization plugin should you choose? 🎯
Installing an image optimizer is the first step to successfully speeding up your WordPress site. From the plugins tested, I found some easier to use than others, while some clearly had an advantage with optimization and performance results.
🛠️ Much of your decision will depend on your budget and how you like the interfaces, but here are my final thoughts on each WordPress image optimizer plugin:
Optimole: This should be your choice if you want the best image optimization. The free plan is particularly attractive for websites with many images and modest traffic levels (up to 2,000 monthly visitors). Paid plans are also rather affordable and come with a CDN, lazy loading, and several automated image scaling options.
ShortPixel: I recommend ShortPixel for its performance and optimization consistency, particularly on mobile. The free version is also an excellent alternative to Optimole’s free version if you have high website traffic, but a low number of images on your site.
Imagify: Consider Imagify for its excellent compression, features, and interface, but beware that the free plan has restrictions that render it useless for most legitimate businesses.
EWWW: Go with EWWW if you need a free image optimizer for WordPress with no file size limits. Skip the free version if you require PNG or next-gen image support. I like it best for its bulk optimization and neatly organized interface. Regardless of how you use it, you’ll most likely need a premium version.
Smush: I like Smush for its unlimited free image compression (both lossy and lossless). The major downside is its five megabyte upload maximum on the free plan. Smush makes the most sense if you’d also like to get all the WPMU DEV plugins in one package or if you already use other WPMU DEV products.
If you have any further questions about these image optimization plugins, let us know in the comments.

FREE GUIDE
4 Essential Steps to Speed Up Your WordPress Website
Follow the simple steps in our 4-part mini series and reduce your loading times by 50-80%. 🚀


Thanks for your very good article. Your extensive testing provided a lot of helpful information and unbiased analysis. Plus, you actually make recommendations; most comparisons these days don’t give a conclusion / recommendation