
Contrary to popular belief, your WordPress media library isn’t a bottomless pit…it just feels like one when every image and video piles up in one place. I’ve been there, scrolling through hundreds of uploads, trying to find that one logo file from last year.
If you’ve ever tried to go back and find old files, you probably realized it’s a major pain. To solve this, you can add WordPress media folders to easily organize your files exactly as you do on your computer.
In this post, I’ll show you how to bring back order to that chaos! First, we’ll look at how to improve your WordPress media library situation without using any plugins. Then, we’ll explore how to keep things tidy and easy to manage with tools that do the heavy lifting for you.
If you make or upload content often, this guide will help you save time, stay organized, and actually enjoy finding your files again.
Quick steps: install and activate Media Library Organizer, go to Media > Library, create a new folder, drag your files into it, and optionally create subfolders to build out your structure.
How to organize your WordPress media library without plugins
Before turning to a WordPress plugin, it’s always wise to consider methods to complete tasks without plugins. This way, you minimize clutter and security vulnerabilities that may come with too many plugins.
There are a few (imperfect) ways to introduce some organization to your WordPress media library without plugins:
- Use the built-in organization system from WordPress
- Attach media uploads to categorized pages or posts (with the option to hide those pages/posts)
Here’s each method explained in detail:
The first option works by utilizing what’s already provided within the WordPress media library. The media library offers two filters and a search bar, meaning you can:
- Actively name media items with specific keyword tags, then find them with the search bar
- Filter by media type
- Filter by date
The date filter, for example, provides the most straightforward categorization method, since it automatically batches media uploads into months and years.
As time passes, you’ll notice these files being automatically created if you access the /uploads folder (inside /wp-content) via an FTP client like FileZilla.

This method works rather well for users where time-oriented folders make the most sense. In WordPress, you can find the media folders by going to Media > Library. Click the All Dates dropdown menu to see the months and dates available.

After picking a month and year, WordPress only shows the media items that were placed into that folder during that time.

Another way to organize your WordPress media library without plugins involves a bit of a workaround. You can attach all media uploads to a single page or post and still use them elsewhere on your website.
This feature isn’t necessarily made for media categorization, but it works rather well considering you can use inactive pages and posts as media “folders,” then filter by those pages and posts inside the WordPress Media Library.
Here’s how to do it.
Create the pages (or posts) that will serve as media folders. Do this by going to Pages > Add New. Create a page title that works as a title for your media folder. Click Publish or Save Draft. Select Public or Private; all of these options allow for attaching images. It doesn’t need to be a public page.

Navigate to Media > Library. Switch to the List View; the Grid View won’t work for filtering based on media items attached to pages and posts.

Under Media > Add New, upload whatever images you’d like to categorize. They must already be uploaded to the WordPress Media Library for this organization method to work.
In the Media Library List View, you’ll see a column header called Uploaded To; Click the Attach link for an image you’d like to add to a folder (page or post).

For this example, we created four pages that will serve as media library folders: Cats, Dogs, Portraits, and Landscapes. When attaching an image, every available page and post is presented in the list. Pick the one that makes the most sense as a folder. Click Select.

Once you’ve added multiple images, go back to the List View of the Media Library. Use the Uploaded To column filter to send all attached images to the top of the list. Here, you can clearly see the pages we’re using as media folders (for this example, Cats and Dogs).

As mentioned, these are all imperfect methods to organize your WordPress media library without plugins. Yet, they may work perfectly for some users. If you’d rather a traditional filing system (where you can quickly rename folders, move folders, and view the entire hierarchy) consider installing a plugin with the following method.
How to add WordPress media folders with Media Library Organizer
In the end, trying to get WordPress to handle your media organization properly is rather tough without plugins. But it becomes a breeze with one.
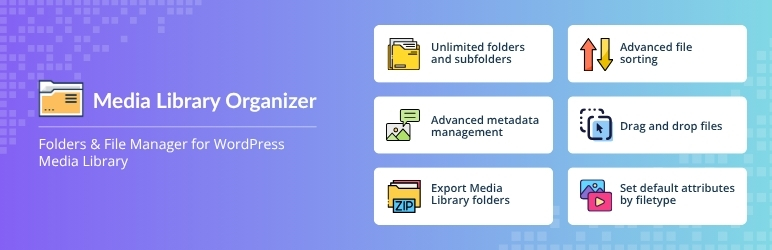
The plugin you can use to get all your media pains go away is called Media Library Organizer. It has a free and paid version – most users will be good with free.
To get started, you can install the plugin like any other WordPress plugin. Just go to Plugins → Add New and put “Media Library Organizer” into the search box. Then, click on Install and Activate.
Once you activate it, a few things are going to happen. First, you’re going to see the plugin’s section in the main sidebar:

Note; you don’t actually need to change any of the default settings to start using media folders – this functionality is enabled from the start.
And, the second thing that’s going to change is that your media library will receive a lot of new abilities and interface improvements:

Most importantly, right there at the top, you can see a new button that says + New Folder.
After clicking it, you’ll be able to enter a new folder name and add it to your site:

Once you do that, you’ll see that new folder on the list:

Now the best part, you can actually grab any media from the main area and drag it to that new folder. You can also click on any individual file and just select the folder it should belong to.

Then, when you’re done organizing, you can click into your folder and see all the media inside it:

This is basically how easy it is. If all you want is to be able to create new folders and then add some media to them for better organization then this is all you need to know.
💡 Note for developers: the Media Library Organizer plugin doesn’t create a mess on the server. The technical implementation of this is that the plugin sets up custom taxonomies for media and then groups them into “virtual folders” based on the taxonomy assigned. It’s a clean solution that doesn’t leave a mess after the plugin is deactivated, and can be migrated easily.
Better media search and added organization
All that said, there’s lots more that Media Library Organizer can do for you.
For starters, it also lets you search through your media using additional parameters – not just date. You can search by fields like alt text, filename, caption, description, and more.

Then, of course, you can filter through to display only media from certain folders.
And, last but not least, you can create subfolders as well. Just create a new folder and then drag it under an existing folder.

Settings and adjustments
I mentioned the settings panel a couple of minutes ago – you know, the one you don’t need to go into if you don’t want to.
But let’s see the main settings quickly anyway so that you know what the plugin is capable of.
The settings panel is divided into a couple of sections. First, we have the Core Settings:

This is where you can enable/disable the filtering options that you find useful for your site. You can also “remember” the last sorting configuration for reuse.
Then, in the Advanced Modules tab, you can see all the pro options that the premium version of the plugin has to offer.

This includes things like auto categorization, EXIF and IPTC data modification, taxonomy manager, and more.
Next, we have the Defaults tab. In it, you can set the default values that are going to be applied to all media on upload. For example, you can set a default alt text (for SEO) or a default title for all your images. This can be useful when running an ecommerce store for example – to make your product media descriptions uniform.

Lastly, in the Image Optimization tab, the plugin lets you enable additional image optimization features that are delivered by the Optimole plugin.
Wrapping things up
If you’re just looking for a free way to add WordPress media folders, then Media Library Organizer is your best option. It comes with all the basic features available for free, plus some nice upgrades for those who’d like to get a bit more nuanced about their media organization.
While there are some work-arounds that you can do to your media library without plugins, honestly, those methods are more of a pain than useful. In my opinion, you’re just better off installing a simple plugin and doing the work in fraction of the time it’d take to do manually.
But what do you think? Are you having difficulties managing your standard WordPress media library? Don’t hesitate to speak up in the comments.

FREE GUIDE
4 Essential Steps to Speed Up Your WordPress Website
Follow the simple steps in our 4-part mini series and reduce your loading times by 50-80%. 🚀


This post was very helpful to me. The Enhanced Media Library was just right for me. Thanks so much!
Folders work great for organizing pics, but if I want to make a fotoseries with the ‘Galery’ feature of WordPress, it keeps pointing me to the base folder (the one it places its currently uploaded pics in).
How do I easily use the galery function whilst my pics are in other WP Media folders?
Already found the “answer”, if I buy the Pro version, it will let me point to the self created subfolders, not sure though if I then still have the ‘Galery feature’ that the Original WP Media folder offers.
Thanks for outlining some options for the WordPress media folder. This is certainly an area where WordPress could be improved upon.
I have some experience with WP Media Folder and wanted to share one additional benefit of that plug-in. Another key difference between WP Media Folder and Media Library Plus is that the URL/path to the media is not changed when you move items to folders that you create in WP Media Folder. You could actually deactivate the plug-in if need be and your links would not break. Definitely worth the money.
I have no affiliation with WP Media Folder; just a happy user.
But does this mean that the folders are simply for organising storage? If I created a folder for a specific type of documents – eg meeting minutes – and then wanted to call up only the documents in that folder, if the URL is unchanged from the normal WP one, would there be a path to be able to call up and loop through only the documents in that folder?
Thanks for this guide Colin.